Thursday, January 23, 2014

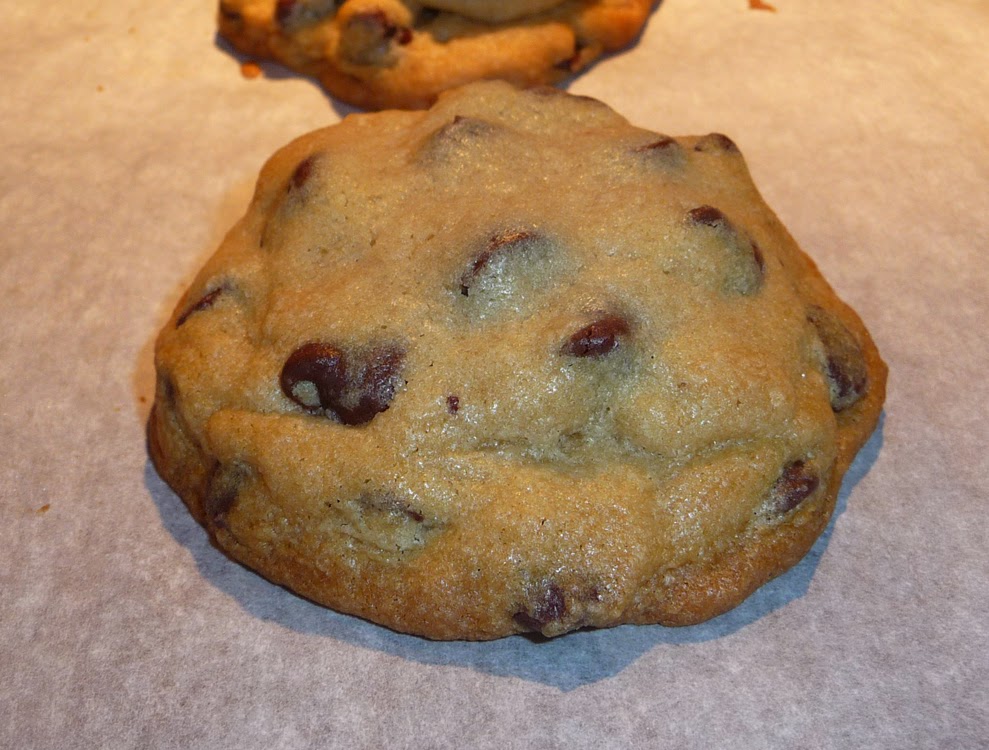
Best Cookie EVER!

My son is not a big fan of cake. Even birthday cake, his own birthday cake, will go uneaten.  I honestly can't even remember the last time I actually made a birthday cake for him.  Usually I just make up my chocolate chip cookies or a pan of brownies for his birthday party instead.  This year I wanted to try out something I saw somewhere... facebook, likely.

An Oreo cookie tucked inside of a chocolate chip cookie.  Or is it a chocolate chip cookie wrapped around an Oreo?  I guess it doesn't really matter.  Besides, it's a chocolate chip cookie AND an Oreo cookie!

I kind of used this recipe at tablespoon dot com.  I say "kind of" because I used my own chocolate chip cookie recipe...which is on the back of the chocolate chip bag.  I guess the only thing I followed was the parchment paper and the 350 degree oven temp.

I started with the good stuff... and of course I sampled them.  I mean, it would be horrible to get a bad package of Oreos, right?

The recipe said to drop a cookie scoop full on to the parchment paper.  I don't have a cookie scoop, I used to... but... well... likely I used it for crafting with since I do that more than baking.  Anyway, I used a teaspoon.  And then I placed the Oreo on the cookie dough.  I'd show you what that looks like but apparently I forgot to take a picture of that.
Drop another scoop of cookie dough on top of the Oreo and kind of work the dough all around the Oreo.
Let me tell ya, cookie dough is sticky and I began to wonder just how long this cookie making process was going to take.  BECAUSE there's a WHOLE LOT of crafting I could be doing instead.
I sampled a few more Oreos and realized...
The parchment paper is PERFECT for getting the chocolate chip cookie dough to mold around the Oreo and it's not nearly as sticky as my fingers for the cookie dough.
Yes, much better.
A little sneak peek into the oven.  These cookies are bigger and thicker than normal chocolate chip cookies which is why the drop in oven temperature is necessary, I'm guessing.  I figured that it took about 15 to 16 minutes for each load of cookies to bake.
I learned as I went along and here's what I learned...  Use less cookie dough on the bottom scoop.  It will spread out.  My first four cookies were over 4 inches across with the Oreo somewhere in the middle.  The teenage testers didn't seem to mind.

Ideally, the cookie is equal parts Oreo and chocolate chip thus each bit it a perfect yummy mix of both cookies.  My last 4 cookies were nearly perfect.
Why 4 at a time?  I'm not exactly the grand champion of maximizing space on a cookie sheet.  My third pan of cookies was actually six cookies, I was impressed!
So that's what it looks like on the inside.  Yummy!! 

I might try mini chocolate chips next time I do this.  I think it might make it easier to get the right amount of chocolate chip cookie dough around the Oreo.  I bet I could get more than 18 cookies out of the mix as well.  I'll have to remember that baking time would likely be less as well.


And here's the plate before the taste testers came back up from the basement rec room for more food.  The plate doesn't look like that now.


The "rec" room is part of my magic shop space so there is no crafting tonight.  Just cookie eating.  Enjoy!

Tuesday, January 21, 2014

The Shop: Totally Thrifty Storage Solutions

Trust me on this one, it's fine to hold on to various items knowing they'll be perfect for crafting with, but to toss them into one giant plastic tote labeled "Good Stuff for Crafting"...nope... that doesn't work.  I had a bin like that for a number of years and in that time, the need for drink umbrellas did come up twice that I remember. I either forgot I had them, or I simply did not have the desire to remove from the bottom of a stack of totes the giant one labeled "Good Stuff" only to have to then, dig through the contents of the container to get to the paper parasols, which may or may not be in there somewhere.


I am now the QUEEN of re-using any plastic container.  Peanut butter, mayonnaise, hot cocoa, rice, even deli counter containers... I love 'em all.  Their various sizes offer me the perfect storage solution for vintage star-burst Christmas tree light covers, fuzzy peeps, Styrofoam golf balls, wicker angels, paper parasols, wayward game pieces, bottle corks, colored vintage tulip Christmas tree light covers, double sided foam tape, wood craft sticks, and suction cups.  The next time I discover the need for a drink umbrella, I'll know exactly where to find it.  As for the Styrofoam golf balls???? My niece and crafting partner told me to hang on to those.  I don't know why but I know exactly where they're at should we discover the need for them.
So now, instead of the imposing and utterly useless tote of "Good Stuff for Crafting", I have drawers like these which hold my former rice container of paper umbrellas and peanut butter jar of wooden craft sticks.  Every thing is neat and easy to get reach.

I have many preferred plastic containers.  One of them is the powdered coffee creamer bottles.  They are just right for decorative yarn that gets used as trim on various denim projects.
I slip an end through the hole in the top, drop the ball of yarn into the container and...
...like magic, I have trim that doesn't tangle, ready for any project.
Remember to give the containers a thorough bath before use... that hot pink yarn has the faint scent of vanilla caramel. 

Clear containers top my list of favorites so I don't have to label them... although... I do love to label things.  Prescription bottles are great for beads while those little cookie sprinkle containers are excellent for pins. Peanut butter jars are a top pick at this house for everything including house paint.  Currently, I'm a huge fan of the Crystal Light containers that contain six packets of drink mix.  I can't drink that stuff but my husband does and he knows to save the container for me.  The absolute BEST part about these wonderful containers is the cost.  THEY ARE FREE!!!

A note here, glass jars are fine but I've broken a few and that's not a fun mess in the craft space. 

All kinds of containers are fair game in this house.  Bins that have long ago lost their lids can easily hold dolls who need hair and bags that are no longer needed contain tattered tents awaiting a new use.

Even the cardboard boxes the baby wipes came in are useful.  These are great because they have handles and are completely disposable should the contents spring a leak. 

Shoe boxes, gift boxes, even old metal strainers previously used to clean fish tank pebbles will work.  Need vintage plastic clothesline pins?  They're in the NIKE box.  (I really should label that.)

All of these previously purposed containers are good to have ready.  Mine sit waiting on the top shelf in my craft storage space.  I don't save EVERY container that comes into my house.  
At this point, I feel as if I have enough coffee cans, small prescription bottles, and creamer containers, but peanut butter jars????
I'll make room for peanut butter jars.


The Shop: My Crafty Storage

I came across this blog, Crafty Storage, last month and I have to say, there are some LOVELY shops out there.  Unfortunately, mine is not one of them.  BUT, I still love it! It's all mine, my stuff, my space, my creative zone.

I've had a space in every house I've owned.  Our first home was a ranch with a finished basement.  That was a great space.  I looked for pictures of the space but came up empty.  Let's just say, it was perfect for my needs at the time.  Carpeted floor, drywall on the walls, plenty of light, and a huge walk in storage closet with shelves for all of my various boxes of fabric.  (I worked for JoAnn Fabrics through high school and college. Lot's of fabric.)  I also had a big work table, a comfy recliner, and a book shelf for all of my craft books.  It was a great space.  Then we moved, moved, and moved again and my creative spaces became smaller and smaller.  I used a dining room with the first move (so uninviting to have that mess at the front door), shared a small walk out basement space with a toddler (who had figured out quick how to turn the computer off) with the second move, and finally with the apartment we lived in while building I was reduced to carving out space in our bedroom with an unused bathroom as storage.  That first house was the last good space I had until now.

Since before we were married, we planned for the day we would build our dream home.  As we lived in or visited various homes through the years, the layout of the dream home changed but the craft space was always there.  One change was the total elimination of a formal dining room and the other was to get the craft/creative space away from the kitchen.  Thank goodness 14 years went into the planning because this place is awesome!

We live in the woods where visits by deer are common.
And this is my wintertime view to the outside.

The space is not finished yet but I'm not really bothered by that as I will gladly take plenty of well-lit space over nicely finished any day.
Yes, it is a walk out and I admit, that is very nice.  Great for crafting especially when the need for spray paint comes up.

The Crafty Storage blog that I mentioned at the beginning of this post has plenty of drool-worthy scrap supply storage solutions.  All of them are so pretty but what if you don't have that kind of money for brand new and matchy-matchy storage products?  (Or simply have too much as my husband will tell you.) Well you end up with something like I have going on here in my shop. 
Garage sale crates, a Craig's list bookshelf, displaced baskets, and some corrugated cardboard magazine holders for the 22 years worth of craft books.

Bulk ware-house metal shelving with a collection of plastic storage totes that spans 19 years.

Former toy bins slipped into wire mesh storage racks and second hand school tables.
It isn't perfect, I do have to deal with a bit of tubing and work around pipe in the floor not to mention the furnace.  The master plan for this house calls for a possible apartment in the basement if the need ever came up.  That master plan also means, I could EASILY have a utility sink in this space.  I would be MORE than HAPPY to work around a utility sink. 
The slat board and metal brackets were purchased three moves ago and are working out perfectly.
Honestly, whether your storage solution is magazine cover worthy or hodge-podge like mine, what it comes down to is organization and being able to easily get to what you've got.  My space may not be pretty but to me, it sure is inviting.  I have plenty of space to work, lots of good light, and I can find any thing I need quickly.
I can't even remember when I picked up these little bins.  They are FABULOUS for storing everything from my glue gun to jingle-bells.  And one drawer just for little bits of possibilities because who knows when an old suitcase lock might be needed for some craft.


Here is the hub of my space; my link to the outside world. Where Mickey Mouse stands ready and the internet offers up endless ideas.
Yes, the basement is where you'll find me.  It's a wee little chilly down here today but I promise, once the creativity kicks in, it's not an issue.